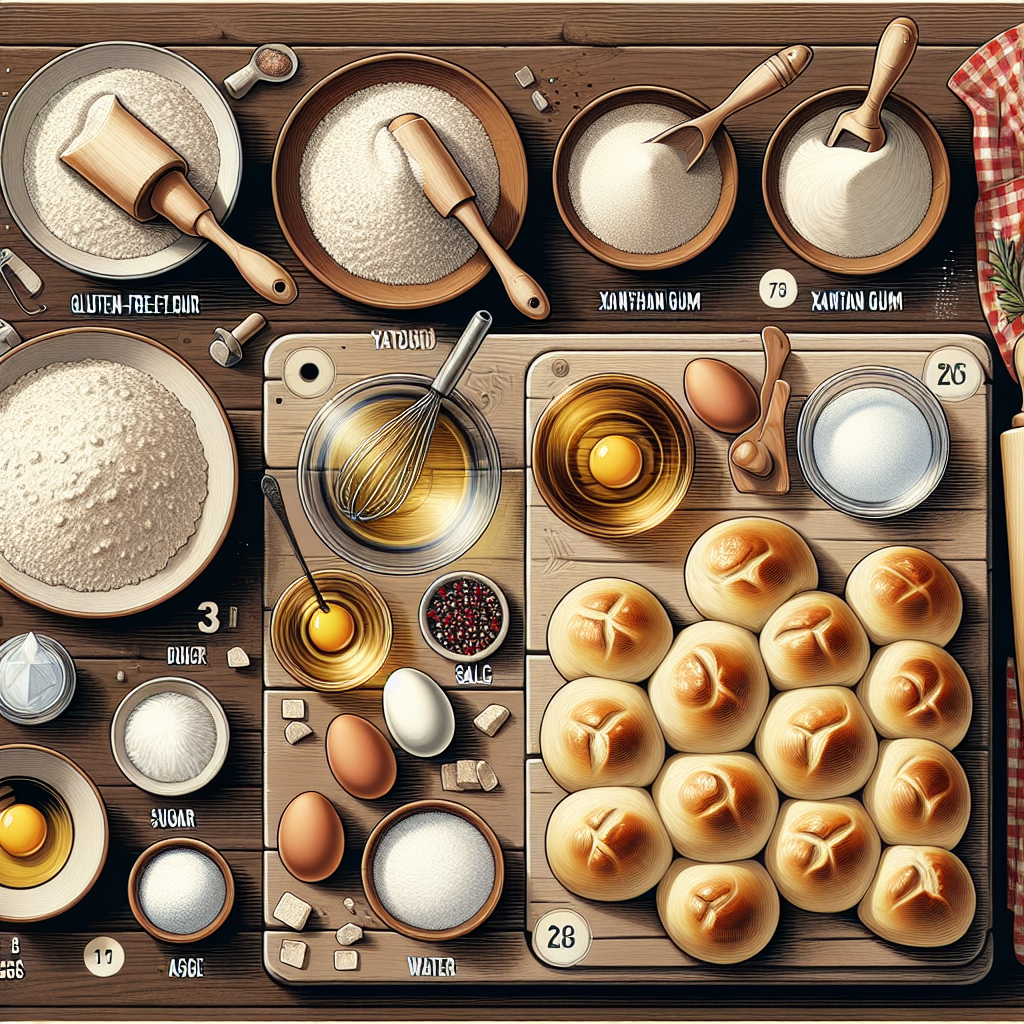
Fluffy Gluten-Free Rolls: A Step-by-Step Guide
[ad_1]
Gluten-free baking has undergone a renaissance in recent years, with more recipes catering to those with gluten intolerances or celiac disease. Among the most delightful gluten-free baked goods are fluffy gluten-free rolls, perfect for any meal or occasion. This article will guide you through the process of making these rolls from scratch, ensuring they’re fluffy and delicious!
Why Choose Gluten-Free Rolls?
Many people choose gluten-free diets for various reasons, including health issues such as celiac disease, gluten sensitivities, or personal preferences. Traditional rolls often rely on gluten-containing flours, which provide structure and rise. However, gluten-free flours can achieve wonderful results with the right combination of ingredients and techniques.
Ingredients You’ll Need
To make your fluffy gluten-free rolls, you will require the following ingredients:
-
- 2 cups gluten-free all-purpose flour (ensure it contains xanthan gum)
-
- 1 cup warm water (about 110°F or 43°C)
-
- 1 packet of instant yeast (2 1/4 teaspoons)
-
- 1 tablespoon honey or sugar
-
- 1/4 cup olive oil or melted butter
-
- 1 teaspoon salt
-
- 1 teaspoon apple cider vinegar
-
- 1 large egg (room temperature)
Equipment Needed
Before diving into the baking process, gather the following tools:
-
- Mixing bowls
-
- Measuring cups and spoons
-
- Whisk
-
- Wooden spoon or spatula
-
- Baking sheet or pan
-
- Parchment paper (optional)
-
- Kitchen towel or plastic wrap
Step-by-Step Guide to Making Fluffy Gluten-Free Rolls
Step 1: Activate the Yeast
In a small bowl, combine the warm water with the honey (or sugar) and yeast. Stir gently and let it sit for about 5-10 minutes until frothy. This step is crucial as it ensures your yeast is active and ready to help the dough rise.
Step 2: Mix Dry Ingredients
In a separate large bowl, whisk together the gluten-free flour and salt. This will help evenly distribute the salt throughout the flour, ensuring consistent flavor in your rolls.
Step 3: Combine Wet Ingredients
In another bowl, combine the olive oil (or melted butter), apple cider vinegar, and egg. Mix well until fully combined.
Step 4: Mix Dough
Once your yeast mixture is frothy, add it to the wet ingredient mixture. Then, pour this mixture into the bowl of dry ingredients. Using a spatula or wooden spoon, mix until a sticky dough forms. The dough should be wet but hold its shape.
Step 5: Rise the Dough
Cover the bowl with a kitchen towel or plastic wrap and place it in a warm, draft-free area. Allow it to rise for 30-45 minutes or until the dough has approximately doubled in size.
Step 6: Shape the Rolls
Once the dough has risen, preheat your oven to 375°F (190°C). Line a baking sheet with parchment paper. Wet your hands slightly (to prevent sticking), and scoop a handful of dough into your palm. Shape it into a ball and place it on the prepared sheet. Repeat until all dough is shaped into rolls, leaving some space between each roll.
Step 7: Second Rise
Cover the shaped rolls with a towel and let them rise again for about 20-30 minutes until they puff up slightly.
Step 8: Bake the Rolls
Once the rolls have risen, bake them in your preheated oven for 20-25 minutes or until golden brown on top. To check for doneness, the internal temperature should be around 200°F (93°C).
Step 9: Cool and Enjoy
Remove the rolls from the oven and let them cool on a wire rack. Serve warm or at room temperature, and enjoy your fluffy gluten-free rolls with your favorite spreads, soups, or as a side to your meal!
Tips for the Perfect Gluten-Free Rolls
Here are some tips that can help improve your gluten-free baking experience:
-
- Use Fresh Ingredients: Ensure your yeast is fresh for best results. Expired yeast may not activate properly.
-
- Measure Accurately: Gluten-free flours can vary significantly in density. Measuring by weight (in grams) can lead to more consistent results.
-
- Check Your Oven: Every oven is different, so it’s a good idea to monitor baking times closely and adjust if necessary.
-
- Experiment with Flours: Using a blend of gluten-free flours (e.g., almond flour, coconut flour, brown rice flour) can add flavor and texture.
-
- Storage: Keep leftover rolls in an airtight container at room temperature for up to 3 days, or freeze for longer storage.
Conclusion
Creating fluffy gluten-free rolls is not only possible but also enjoyable! With the right ingredients and a bit of patience, you can bake delicious rolls that everyone will love, regardless of their dietary restrictions. Whether served at dinner, with breakfast, or as a snack, these rolls are sure to impress. Enjoy the process, experiment with flavors, and most importantly, enjoy the fruits of your labor!
FAQs About Fluffy Gluten-Free Rolls
1. Can I use a different type of gluten-free flour?
Yes, you can experiment with different gluten-free flours, but ensure they contain a structure-building element like xanthan gum or psyllium husk for best results.
2. Is it necessary to use instant yeast?
Instant yeast is recommended for its convenience and quick rising time. However, you can use active dry yeast; just ensure to activate it properly before mixing it into the dough.
3. What can I add to enhance flavor?
You can add herbs, cheese, garlic powder, or even seeds to the dough to enhance the flavor of your rolls.
4. How can I make these rolls dairy-free?
Use olive oil or coconut oil instead of butter and replace any dairy ingredients with non-dairy alternatives.
5. Can I make the dough ahead of time?
Yes, you can prepare the dough in advance and refrigerate it after the first rise. Just take it out and allow it to come to room temperature before shaping and baking.