Cinnamon rolls are a beloved treat enjoyed by many, whether for breakfast, brunch, or dessert. However, for those with gluten sensitivities or celiac disease, traditional cinnamon rolls (which are made with wheat flour) can be off-limits. Fortunately, with the rise of gluten-free baking, it is possible to create delicious, fluffy cinnamon rolls that can be enjoyed by everyone. In this guide, we will cover everything you need to know about making gluten-free cinnamon rolls, including tips, tricks, and a step-by-step recipe for perfect results every time.
Understanding Gluten-Free Baking
Before diving into the specifics of making gluten-free cinnamon rolls, it’s crucial to understand how gluten-free baking differs from traditional baking. Gluten is a protein found in wheat, barley, and rye that provides structure to baked goods. Without gluten, achieving the same texture and rise can be challenging, yet it is entirely possible with the right ingredients and techniques.
Choosing the Right Gluten-Free Flour
The foundation of any gluten-free recipe lies in the choice of flour. Not all gluten-free flours are the same; each offers a unique texture and flavor. Here are some popular gluten-free flours you can use for cinnamon rolls:
-
- Almond Flour: Provides moisture and a nutty flavor but often needs to be combined with other flours to improve structure.
-
- Coconut Flour: Highly absorbent and requires additional liquid. Use it sparingly.
-
- Rice Flour: A common base flour but can create a grainy texture if used alone.
-
- Gluten-Free All-Purpose Flour: A blend that mimics the properties of wheat flour; look for brands that include xanthan gum.
For the best results, use a blend of gluten-free flours. Commercial blends designed for baking usually contain xanthan gum or guar gum, which helps provide structure and elasticity.
Essential Ingredients for Gluten-Free Cinnamon Rolls
In addition to gluten-free flour, you will need several other key ingredients to make delicious cinnamon rolls:
-
- Yeast: Use active dry yeast or instant yeast to help your rolls rise.
-
- Sugar: Granulated sugar is usually the best choice, but you can also use brown sugar for a richer flavor.
-
- Milk: Any kind of milk will work, but almond milk or oat milk are great dairy-free options.
-
- Butter: Regular or dairy-free butter will add richness and flavor.
-
- Eggs: Eggs add moisture and help the rolls hold their shape; you can use flax eggs or other egg substitutes for a vegan version.
-
- Cinnamon: The star of the show! Use fresh cinnamon for the best flavor.
-
- Salt: Enhances flavor and balances sweetness.
Step-by-Step Recipe for Gluten-Free Cinnamon Rolls
Now that you have your ingredients ready, let’s walk through a simple step-by-step recipe for making gluten-free cinnamon rolls.
Ingredients
-
- 2 cups gluten-free all-purpose flour
-
- 1/2 cup milk (or dairy-free alternative)
-
- 1/4 cup sugar
-
- 1/4 cup melted butter (or coconut oil)
-
- 1 packet (2 1/4 tsp) active dry yeast
-
- 1 large egg (or flax egg)
-
- 1 tsp vanilla extract
-
- 1/2 tsp salt
-
- Filling: 2 tbsp cinnamon, 1/4 cup brown sugar, and 1/4 cup melted butter
-
- Icing (optional): powdered sugar, milk, and vanilla extract
Instructions
-
- Activate the Yeast: In a small bowl, mix the warm milk with the yeast and a teaspoon of sugar. Let it sit for about 5-10 minutes until frothy.
-
- Combine Dry Ingredients: In a large mixing bowl, whisk together the gluten-free flour, remaining sugar, salt, and cinnamon.
-
- Mix Wet Ingredients: In another bowl, mix the melted butter, egg, and vanilla extract. Once the yeast mixture is frothy, add it to the wet ingredients.
-
- Form the Dough: Pour the wet ingredients into the dry ingredients and mix until a soft dough forms. The dough will be stickier than traditional dough.
-
- Rise: Cover the bowl with a clean kitchen towel and let it rise in a warm area for about 1 hour, or until it has doubled in size.
-
- Prepare the Filling: In a small bowl, mix the melted butter, brown sugar, and cinnamon.
-
- Roll Out the Dough: Once risen, dust your work surface with gluten-free flour and roll out the dough into a rectangle (about 1/4 inch thick).
-
- Add Filling: Spread the cinnamon filling evenly over the dough, leaving a small border around the edges.
-
- Roll and Cut: Carefully roll the dough into a log, then slice it into 12 pieces. Place them in a greased baking dish.
-
- Second Rise: Cover and let the cinnamon rolls rise again for 30-45 minutes.
-
- Bake: Preheat the oven to 350°F (175°C). Bake rolls for 25-30 minutes, or until golden brown.
-
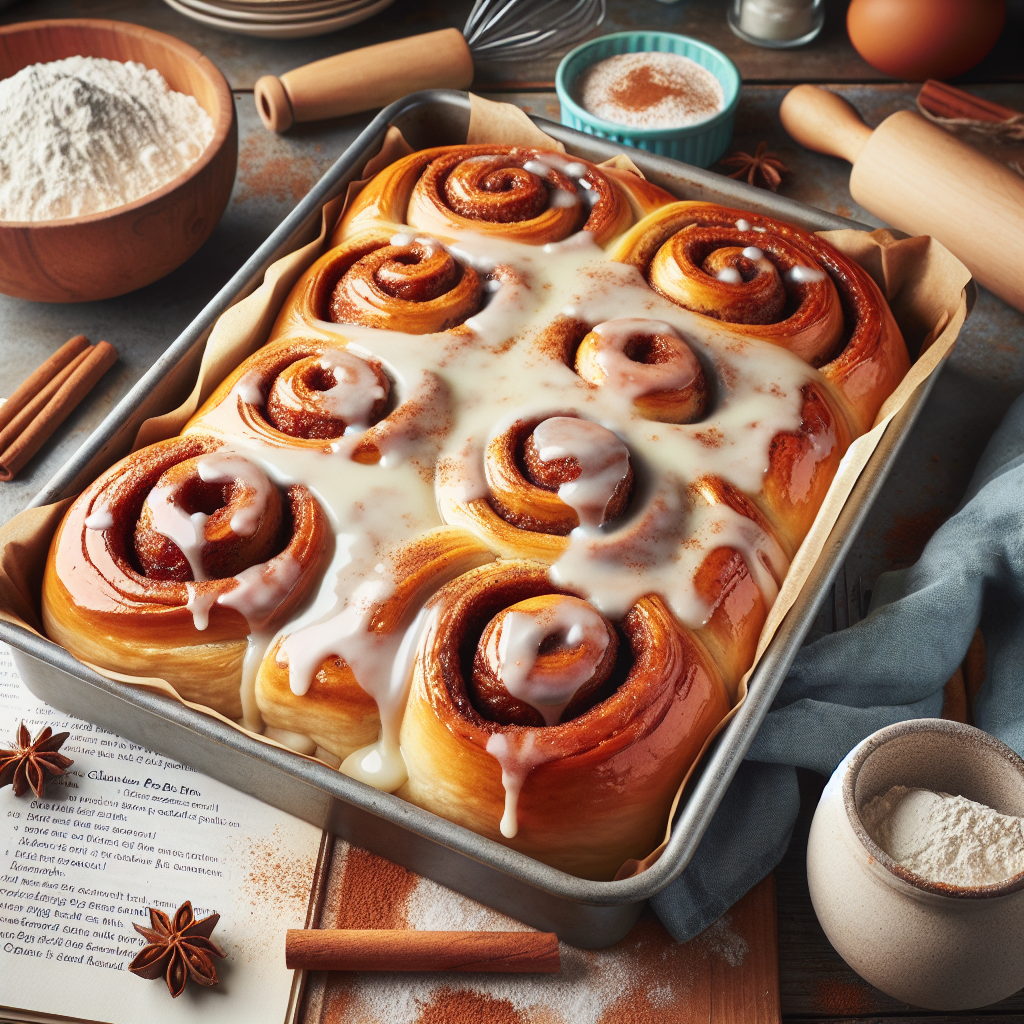
- Make the Icing (optional): Whisk together powdered sugar, milk, and vanilla extract, then drizzle over warm cinnamon rolls.
Tips and Tricks for Perfect Gluten-Free Cinnamon Rolls
-
- Don’t Overmix: Over-mixing the dough can lead to dense rolls. Mix just until combined.
-
- Moisture is Key: Gluten-free dough can dry out quickly. Ensure your dough stays moist, and don’t be afraid to add a bit more milk if necessary.
-
- Use a Warm Environment: Yeast rises best in a warm environment. If your kitchen is cool, consider preheating your oven to the lowest setting, turning it off, and letting the dough rise inside.
-
- Experiment with Flavors: Feel free to add nuts, raisins, or chocolate chips to the filling for added flavor and texture.
-
- Storage: Store any leftover rolls in an airtight container. You can reheat them in the microwave or the oven to maintain their softness.
Serving Suggestions
Gluten-free cinnamon rolls are delightful on their own, but there are many ways to elevate the experience:
-
- Pair with Coffee or Tea: Enjoy your cinnamon rolls with a warm cup of coffee, tea, or hot chocolate for a comforting treat.
-
- Top with Cream Cheese Frosting: For a richer dessert, consider topping your rolls with a cream cheese frosting made from softened cream cheese, powdered sugar, and a splash of milk.
-
- Garnish with Nuts: Chopped pecans or walnuts sprinkled on top can add a delicious crunch.
Common Mistakes to Avoid When Making Gluten-Free Cinnamon Rolls
Even experienced bakers can encounter challenges when making gluten-free baked goods. Here are some common pitfalls and how to avoid them:
-
- Using Only One Type of Flour: Relying solely on a single gluten-free flour may result in a dense texture. Always use a blend of flours for the best results.
-
- Not Allowing Enough Rise Time: Yeast needs time to work, so don’t rush the rising stages. This is critical for texture and flavor.
-
- Skipping the Icing: Always consider icing or drizzling a glaze over your rolls as it enhances the flavor dramatically.
-
- Overbaking: Keep a close eye on your rolls towards the end of baking to avoid dryness.
-
- Not Letting Them Cool: For the best texture and flavor, let the rolls cool slightly before serving.
Conclusion
Making gluten-free cinnamon rolls can be simple and rewarding. With the right ingredients, techniques, and a bit of patience, you can create soft, fluffy rolls that everyone will love. Remember to experiment with flavors, find the flour blends that work best for you, and enjoy the process of baking. Whether you’re sharing these treats with friends and family or savoring them all on your own, gluten-free cinnamon rolls are a delightful addition to any table.
FAQs about Gluten-Free Cinnamon Rolls
1. Can I use store-bought gluten-free dough for cinnamon rolls?
Yes! Many brands offer gluten-free dough that can be used to make cinnamon rolls. Just ensure to follow the package instructions and add your desired filling.
2. How do I store leftover cinnamon rolls?
Store any leftover rolls in an airtight container at room temperature for up to 2 days. For longer storage, refrigerate them for up to a week or freeze them for up to three months.
3. Can I make gluten-free cinnamon rolls vegan?
Absolutely! Substitute eggs with flax eggs (1 tablespoon ground flaxseed mixed with 2.5 tablespoons water) and use dairy-free milk and butter alternatives.
4. What can I use in place of xanthan gum?
If you don’t have xanthan gum, you can use guar gum or psyllium husk as a binding agent in similar amounts.
5. Can I prepare the dough in advance?
Yes! You can prepare the dough in advance and refrigerate it after the first rise. When you’re ready to bake, let it come to room temperature before proceeding with the second rise.